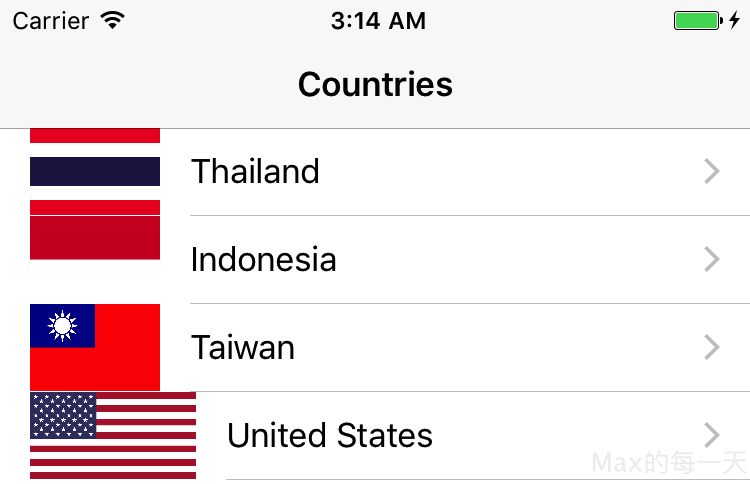
原來,不是只有我遇到,很多人的 uitableviewcell imageview 都長的跟我一樣。

Here’s how i did it. This technique takes care of moving the text and detail text labels appropriately to the left:
@interface SizableImageCell : UITableViewCell {}
@end
@implementation SizableImageCell
- (void)layoutSubviews {
    [super layoutSubviews];

    float desiredWidth = 80;
    float w=self.imageView.frame.size.width;
    if (w>desiredWidth) {
        float widthSub = w - desiredWidth;
        self.imageView.frame = CGRectMake(self.imageView.frame.origin.x,self.imageView.frame.origin.y,desiredWidth,self.imageView.frame.size.height);
        self.textLabel.frame = CGRectMake(self.textLabel.frame.origin.x-widthSub,self.textLabel.frame.origin.y,self.textLabel.frame.size.width+widthSub,self.textLabel.frame.size.height);
        self.detailTextLabel.frame = CGRectMake(self.detailTextLabel.frame.origin.x-widthSub,self.detailTextLabel.frame.origin.y,self.detailTextLabel.frame.size.width+widthSub,self.detailTextLabel.frame.size.height);
        self.imageView.contentMode = UIViewContentModeScaleAspectFit;
    }
}
@end

...

- (UITableViewCell *)tableView:(UITableView *)tableView cellForRowAtIndexPath:(NSIndexPath *)indexPath {
    static NSString *CellIdentifier = @"Cell";

    UITableViewCell *cell = [tableView dequeueReusableCellWithIdentifier:CellIdentifier];
    if (cell == nil) {
        cell = [[[SizableImageCell alloc] initWithStyle:UITableViewCellStyleSubtitle reuseIdentifier:CellIdentifier] autorelease];
        cell.accessoryType = UITableViewCellAccessoryDisclosureIndicator;
    }

    cell.textLabel.text = ...
    cell.detailTextLabel.text = ...
    cell.imageView.image = ...
    return cell;
}You can not change the properties of cell.imageView field when you use UITableViewCellbecause imageView is read-only property in this case. The easiest way to achieve the result in this case is to create subclass of UITableViewCell and use it to customize what you need in layoutSubviews method for example like this:
class CustomTableViewCell: UITableViewCell {

    override func awakeFromNib() {
        super.awakeFromNib()
    }

    override func setSelected(selected: Bool, animated: Bool) {
        super.setSelected(selected, animated: animated)
    }

    // Here you can customize the appearance of your cell
    override func layoutSubviews() {
        super.layoutSubviews()
        // Customize imageView like you need
        self.imageView?.frame = CGRectMake(10,0,40,40)
        self.imageView?.contentMode = UIViewContentMode.ScaleAspectFit
        // Costomize other elements
        self.textLabel?.frame = CGRectMake(60, 0, self.frame.width - 45, 20)
        self.detailTextLabel?.frame = CGRectMake(60, 20, self.frame.width - 45, 15)
    }
}
And inside your tableView(tableView: UITableView, cellForRowAtIndexPath indexPath: NSIndexPath) function you can only replace cell object creation from UITableViewCell to CustomTableViewCell:
func tableView(tableView: UITableView, cellForRowAtIndexPath indexPath: NSIndexPath) -> UITableViewCell {
    let cell: CustomTableViewCell = CustomTableViewCell(style: UITableViewCellStyle.Subtitle, reuseIdentifier: "Cell")
    cell.imageView!.layer.cornerRadius = 20
    cell.imageView!.clipsToBounds = true
    let imageData = try! resultsImageFileArray[indexPath.row].getData()
    let image = UIImage(data: imageData)
    cell.imageView?.image = image

    cell.textLabel?.text = self.resultsNameArray[indexPath.row]
    cell.detailTextLabel?.text = self.message3Array[indexPath.row]

    return cell
}
from:
http://stackoverflow.com/questions/35665318/different-size-of-image-using-cell-imageview-image-swift