PyQt 很多人在用,但用在公司的產品上,可能要考慮授權或付費問題。使用較多人在用的,遇到問題時會有比較多人幫忙解決。
目前 amazon書店出最多書的是Tkinter, 其次是pyqt:
https://www.amazon.com/s?k=python+gui
一份統計Best Python GUI Framework|Toolkits 2019 [Ultimate Guide]的調查, 前10名順序如下:
https://techsore.com/best-python-gui/
- Tkinter
- Kivy
- PyQT
- WxPython
- Libavg
- PySide
- PyGUI
- Pyforms
- Wax Python GUI
- PySimpleGUI
這篇文章介紹的順序如下:
- Eel
- Kivy
- Flexx
- PyQt
- wxPython
- Tkinter
- PySimpleGUI
- PyGObject
- PySide2 / PySide6
- Streamlit
Eel
https://github.com/samuelhwilliams/Eel
Eel is a little Python library for making simple Electron-like offline HTML/JS GUI apps, with full access to Python capabilities and libraries.
Eel 是一個python輕量級的GUI第三方的module,可以透過local 伺服器實現web與python之間的溝通,所以整個介面會以網頁方式呈現(會用chrome開啟),也就是可以用HTML 與CSS 去控制呈現的風格,然後用JS 與python 互相呼叫。
如果你的GUI都放在 web 目錄下,可以使用下面script 來啟動你的GUI:
import eel
eel.init('web')
eel.start('main.html')
This will start a webserver on the default settings (http://localhost:8000) and open a browser to http://localhost:8000/main.html.
If Chrome or Chromium is installed then by default it will open in that in App Mode (with the --app cmdline flag), regardless of what the OS’s default browser is set to (it is possible to override this behaviour).
參考看看教學文章:
Python Eel 創造個人網頁GUI桌面應用程式(入門篇)
https://medium.com/@neutron0916/2500b38ed070
使用 electron 來發佈執行檔,在打包時會佔用較多的空間,網友反應執行時的效能不會太差,只是因為用chromium 核心所以記憶體用量會稍微高一點。
Kivy
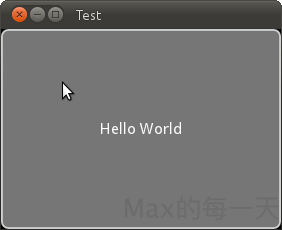
Kivy是一個開源工具包能夠讓使用相同原始碼創建的程序能跨平台運行。它主要關注創新型用戶介面開發,如:多點觸摸應用程式。Kivy還提供一個多點觸摸滑鼠模擬器。當前支持的平台包括:Linux、Windows、Mac OS X和Android。
Kivy擁有能夠處理動畫、緩存、手勢、繪圖等功能。它還內置許多用戶介面控制項如:按紐、攝影機、表格、Slider和樹形控制項等。
程式範例:
from kivy.app import App
from kivy.uix.button import Button

class TestApp(App):
    def build(self):
        return Button(text='Hello World')

TestApp().run()
執行畫面:
Flexx
http://flexx.readthedocs.io/en/latest/
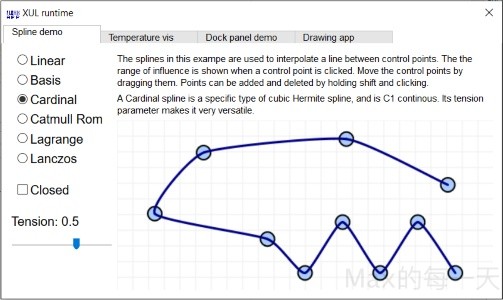
Flexx 是一個純 Python 工具包,用來創建圖形化介面應用程式。其使用 Web 技術進行介面的渲染。你可以用 Flexx 來創建桌面應用,同時也可以導出一個應用到獨立的 HTML 文檔。因為使用純 Python 開發,所以 Flexx 是跨平台的。只需要有 Python 和瀏覽器就可以運行。
執行畫面:
PyQt
https://wiki.python.org/moin/PyQt
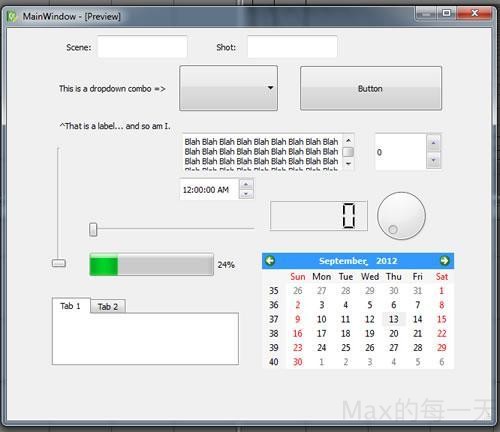
PyQt是Qt庫的Python版本。PyQt3支持Qt1到Qt3。 PyQt4支持Qt4。它的首次發布也是在1998年,但是當時它叫 PyKDE,因為開始的時候SIP和PyQt沒有分開。PyQt是用SIP寫的。PyQt 提供 GPL版和商業版。意思是使用 PyQt 做出商業用途是需要付錢的。
Q:PyQt5, 不過我有遇到多執行執行緒時,無法使用彈出視窗(警示窗)的問題!
A:原因是因為子線程不能夠顯示介面,只要在子執行緒傳個signal到主線程,再顯示就可以。
PyQt5 授權:
http://pyqt.sourceforge.net/Docs/PyQt5/introduction.html#license
wxPython
wxPython 是 Python 語言的一套優秀的 GUI 圖形庫,允許 Python 程式設計師很方便的創建完整的、功能鍵全的 GUI 用戶介面。 wxPython 是作為優秀的跨平台 GUI 庫 wxWidgets 的 Python 封裝和 Python 模塊的方式提供給用戶的。
就如同Python和wxWidgets一樣,wxPython也是一款開源軟體,並且具有非常優秀的跨平台能力,能夠運行在32位windows、絕大多數的Unix或類Unix系統、Macintosh OS X上。
範例程式:
#!/bin/python
"""
Hello World, but with more meat.
"""

import wx

class HelloFrame(wx.Frame):
    """
    A Frame that says Hello World
    """

    def __init__(self, *args, **kw):
        # ensure the parent's __init__ is called
        super(HelloFrame, self).__init__(*args, **kw)

        # create a panel in the frame
        pnl = wx.Panel(self)

        # and put some text with a larger bold font on it
        st = wx.StaticText(pnl, label="Hello World!", pos=(25,25))
        font = st.GetFont()
        font.PointSize += 10
        font = font.Bold()
        st.SetFont(font)

        # create a menu bar
        self.makeMenuBar()

        # and a status bar
        self.CreateStatusBar()
        self.SetStatusText("Welcome to wxPython!")


    def makeMenuBar(self):
        """
        A menu bar is composed of menus, which are composed of menu items.
        This method builds a set of menus and binds handlers to be called
        when the menu item is selected.
        """

        # Make a file menu with Hello and Exit items
        fileMenu = wx.Menu()
        # The "\t..." syntax defines an accelerator key that also triggers
        # the same event
        helloItem = fileMenu.Append(-1, "&Hello...\tCtrl-H",
                "Help string shown in status bar for this menu item")
        fileMenu.AppendSeparator()
        # When using a stock ID we don't need to specify the menu item's
        # label
        exitItem = fileMenu.Append(wx.ID_EXIT)

        # Now a help menu for the about item
        helpMenu = wx.Menu()
        aboutItem = helpMenu.Append(wx.ID_ABOUT)

        # Make the menu bar and add the two menus to it. The '&' defines
        # that the next letter is the "mnemonic" for the menu item. On the
        # platforms that support it those letters are underlined and can be
        # triggered from the keyboard.
        menuBar = wx.MenuBar()
        menuBar.Append(fileMenu, "&File")
        menuBar.Append(helpMenu, "&Help")

        # Give the menu bar to the frame
        self.SetMenuBar(menuBar)

        # Finally, associate a handler function with the EVT_MENU event for
        # each of the menu items. That means that when that menu item is
        # activated then the associated handler function will be called.
        self.Bind(wx.EVT_MENU, self.OnHello, helloItem)
        self.Bind(wx.EVT_MENU, self.OnExit,  exitItem)
        self.Bind(wx.EVT_MENU, self.OnAbout, aboutItem)


    def OnExit(self, event):
        """Close the frame, terminating the application."""
        self.Close(True)


    def OnHello(self, event):
        """Say hello to the user."""
        wx.MessageBox("Hello again from wxPython")


    def OnAbout(self, event):
        """Display an About Dialog"""
        wx.MessageBox("This is a wxPython Hello World sample",
                      "About Hello World 2",
                      wx.OK|wx.ICON_INFORMATION)


if __name__ == '__main__':
    # When this module is run (not imported) then create the app, the
    # frame, show it, and start the event loop.
    app = wx.App()
    frm = HelloFrame(None, title='Hello World 2')
    frm.Show()
    app.MainLoop()
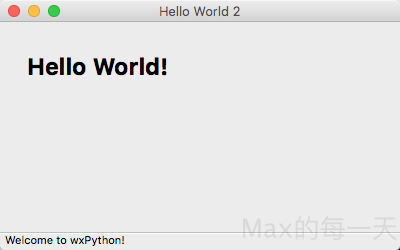
執行畫面:
Tkinter
- Python 3: https://docs.python.org/3/library/tk.html
- Python 2: https://docs.python.org/2/library/tkinter.html
Tkinter 是使用python 進行窗口視窗設計的模塊. 簡單的構造, 多平台, 多系統的兼容性, 能讓它成為讓你快速入門定制窗口文件的好助手. 它在python 窗口視窗模塊中是一款簡單型的
Tk 原先是為 Tcl 語言所開發的 GUI 套件, 因為是 Tcl 的第一個擴充, 所以現在都合起來稱呼為 Tcl/Tk. Tcl 是一種以 string-based 的跨平台工具命令式直譯語言 (Tool command language), 繼承了 LISP/C/Shell 等語言的優點, 並具有語法簡單, 容易擴展與可靈活嵌入其他語言的特點, 而且全面支持 unicode.
而 Tkinter 是 Python 內建的標準模組, 內部嵌入了 Tcl/Tk GUI 套件, 用來在 Python 中建構 GUI 圖形介面程式, 它具有如下優點 :
- 簡單易學 :
比 Python 其他 GUI 要容易, 甚至於我覺得比學 Java Swing 還容易. - 程式碼精簡 :
以很短的程式碼便能產生強大功能的 GUI 程式. - 跨平台 :
同樣的程式可以在 Linux/Windows/Mac 等系統上執行.
不過在 Python 2 中的模組名稱 Tkinter 到 Python 3 版後已被改為小寫的 tkinter, 使用時要注意所用之 Python 版本, 匯入時注意該用首字大寫與否. 不過 Python 2 下以 Tkinter 所寫的 GUI 程式可以利用 2to3 程式轉成 Python 3 版的程式.
教學:
https://morvanzhou.github.io/tutorials/python-basic/tkinter/
範例程式:
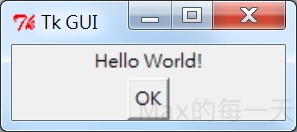
import Tkinter as tk
win=tk.Tk() #建立視窗容器物件
win.title(“Tk GUI”)
label=tk.Label(win, text=”Hello World!”) #建立標籤物件
label.pack() #顯示元件
button=tk.Button(win, text=”OK”)
button.pack() #顯示元件
win.mainloop()
執行畫面:
Max 學習 tkinter:
https://stackoverflow.max-everyday.com/tag/tkinter/
PySimpleGUI
github:
https://github.com/PySimpleGUI/PySimpleGUI
PySimpleGUI 嘗試解決上述 GUI 難題,它提供了一種簡單明了、易於理解、方便自定義的 GUI 接口。
Install
pip install pysimplegui
or
pip3 install pysimplegui
Sample Code
import PySimpleGUI as sg
 All the stuff inside your window.
 layout = [  [sg.Text('Some text on Row 1')],
             [sg.Text('Enter something on Row 2'), sg.InputText()],
             [sg.Button('Ok'), sg.Button('Cancel')] ]
 Create the Window
 window = sg.Window('Window Title', layout)
 Event Loop to process "events" and get the "values" of the inputs
 while True:
     event, values = window.read()
     if event in (None, 'Cancel'):    # if user closes window or clicks cancel
         break
 window.close()
上面程式碼產出視窗

PyGObject
https://pygobject.readthedocs.io/en/latest/
PyGTK是一套用Python封裝的,用於GTK+的GUI庫。PyGTK是在LGPL授權下的自由軟體。它的作者是著名的GNOME開發者James Henstridge。
PyGTK沒有人在維護了, 取而代之的是 PyGObject。
PyGObject is a Python package which provides bindings for GObject based libraries such as GTK, GStreamer, WebKitGTK, GLib, GIO and many more.
It supports Linux, Windows and macOS and works with Python 2.7+, Python 3.5+, PyPy and PyPy3. PyGObject, including this documentation, is licensed under the LGPLv2.1+.
If you want to write a Python application for GNOME or a Python GUI application using GTK, then PyGObject is the way to go. For more information on specific libraries check out the “Python GTK 3 Tutorial” and the “Python GI API Reference”.
import gi
gi.require_version("Gtk", "3.0")
from gi.repository import Gtk

window = Gtk.Window(title="Hello World")
window.show()
window.connect("destroy", Gtk.main_quit)
Gtk.main()
PySide2 / PySide6
https://wiki.qt.io/Qt_for_Python
PySide是跨平台的應用程式框架Qt的Python綁定版本。在2009年8月,PySide首次發布。提供和PyQt類似的功能,並相容API。但與PyQt不同處為使用LGPL授權。
Qt for Python is available under LGPLv3/GPLv2 and commercial license for the following platforms: Linux / macOS / Windows.
安裝:
pip install PySide2
Sample Code:
import sys
 from PySide2.QtWidgets import QApplication, QLabel
 if name == "main":
     app = QApplication(sys.argv)
     label = QLabel("Hello World")
     label.show()
     sys.exit(app.exec_())
其他已經沒有在維護的,建議避免使用
pyui4win
https://github.com/huqinghua/pyui4win
Python for Win32 (pywin32)
https://github.com/mhammond/pywin32
這個原本沒什麼在維護,最近好像遇到好心人去更新一些檔案。
You can install pywin32 via pip:
pip install pywin32
如果是推薦給初學者中的初學者,可以玩看看這個線上版的的python編輯器:
a simple Python editor for beginner programmers.
https://codewith.mu/
Streamlit
Streamlit 是個可快速製作出 Web 網頁前端的框架,而且不需要任何前端技術,全部都採用 Python 語法。讓你將網路爬蟲、數據科學、機器學習資料簡單地呈現出來分享,是一個很方便的套件。
Streamlit is an open-source app framework for Machine Learning and Data Science teams. Create beautiful data apps in hours, not weeks. All in pure Python.
安裝:
pip install streamlit
使用方法:
streamlit py的程式檔案路徑
pyGTK被pyGObject取代了