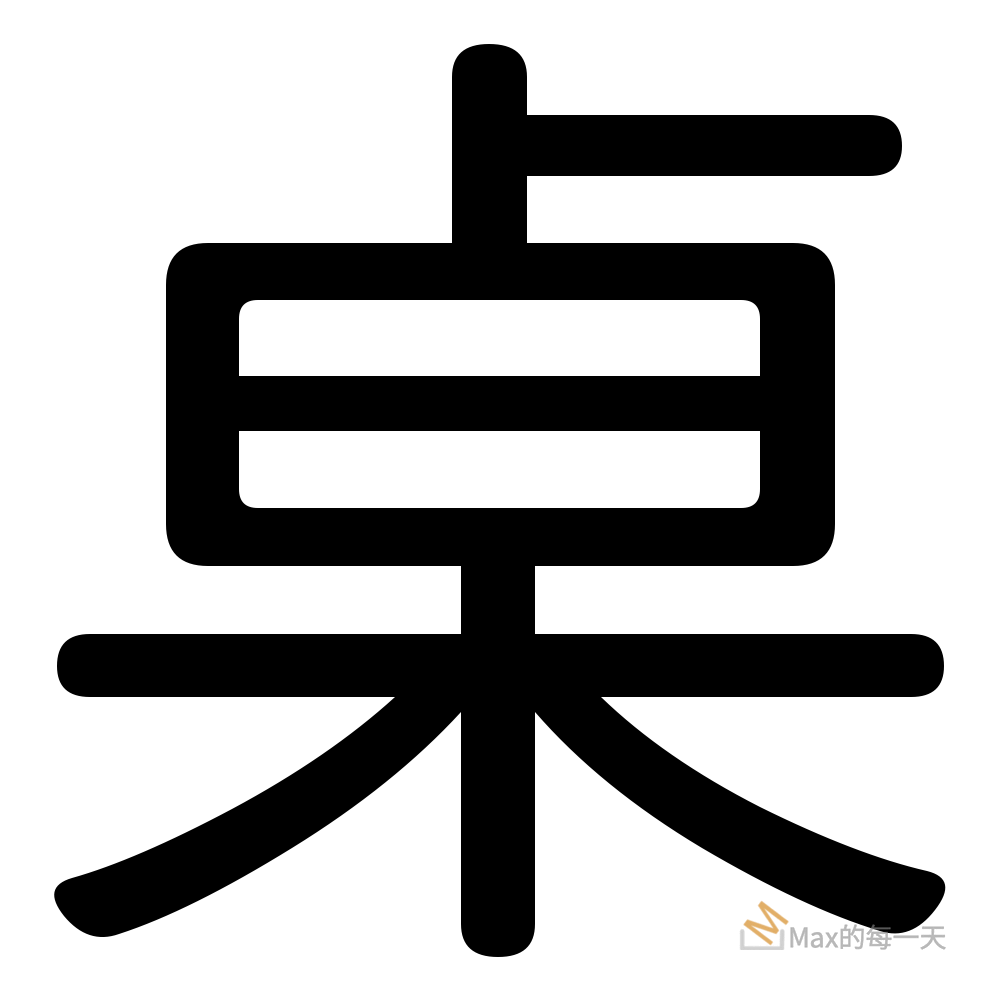
測試了幾個寫法,終於找到一個比較適合大多數字型印文字方式,來看看我的結果:

上面的「桌」字是用width x height 1000×1000 來輸入,使用 PIL 的 ImageFont,似乎對 TrueType .ttf 字體的相容程度會比 .otf 的好一點,但還是無法以同一個程式套用到其他的 .ttf,有些還是怪怪的。
來看看stackoverflow 上網友的分享:
https://stackoverflow.com/questions/43060479/how-to-get-the-font-pixel-height-using-pils-imagefont-class

font = ImageFont.truetype('arial.ttf', font_size)
ascent, descent = font.getmetrics()
(width, baseline), (offset_x, offset_y) = font.font.getsize(text)
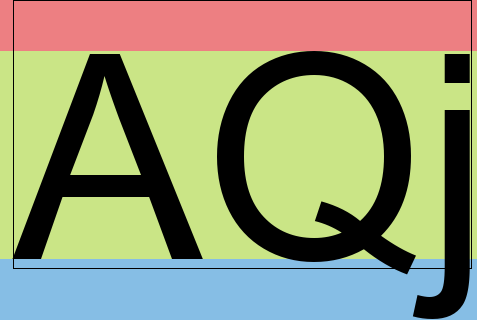
left, top, right, bottom = font.getmask(text).getbbox()- 紅色的高度 Height of red area:
offset_y - 綠色的高度 Height of green area:
ascent - offset_y - 藍色的高度 Height of blue area:
descent - 黑色的長方形資訊 Black rectangle:
font.getmask(text).getbbox()
實際上想取得上圖「黑色長方形」區塊,沒有想像中的順利。
情境1:使用思源黑體,在設定 left,top 都為 0 還是有一大塊的空白區塊。
情境2:直接使用 -1 * offset_y 為 top 值輸出文字, 會造成都只切齊筆畫裡黑色最高的部份,這也是很奇怪。
Max 的折衷作法:
# create an image
out = Image.new("L", (CANVAS_SIZE, CANVAS_SIZE), 255)

# get a font
src_font = "your-font-path.ttf"

#print(os.path.isfile(src_font))
font = ImageFont.truetype(src_font, CHAR_SIZE)
ascent, descent = font.getmetrics()
(width, baseline), (offset_x, offset_y) = font.font.getsize(text)
left, top, right, bottom = font.getmask(text).getbbox()

# get a drawing context
d = ImageDraw.Draw(out)
total_height = ascent + descent
new_offset_y = -1 * ((total_height-CHAR_SIZE)/2)
d.text((0, new_offset_y), text, font=font, fill=(0))
out.save(filename)
python example code download:
https://github.com/max32002/MaxFontScripts/blob/master/drawtext.py
PIL官方的教學文件:
https://pillow.readthedocs.io/en/3.1.x/reference/ImageDraw.html
