由於想在 macOS 裡操作Ubuntu 所以安裝了一個 VM, 但一開始給的容量太小,只設了 9GB,用了一陣子之後就滿了,很多的系統異常都跑出來,很花時間,所以需要 resize partition。
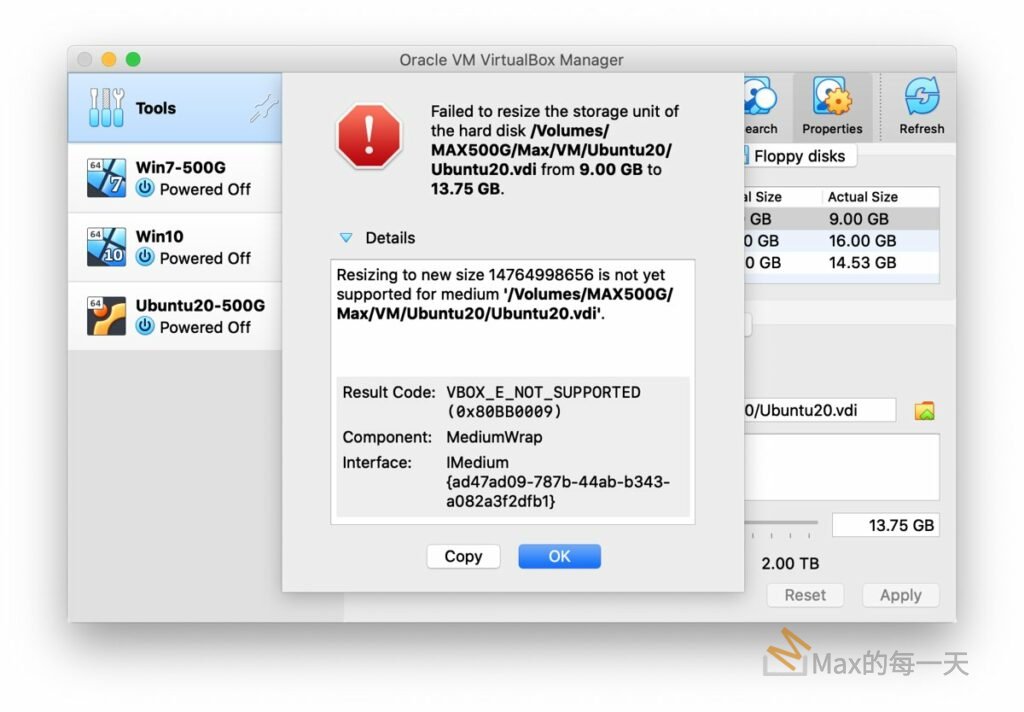
一開始直接 resize VirtualBox 的硬碟,會出現錯誤:
Failed to resize the storage unit of the hard disk xxxx.vdi from x.xx GB to z.zz GB.
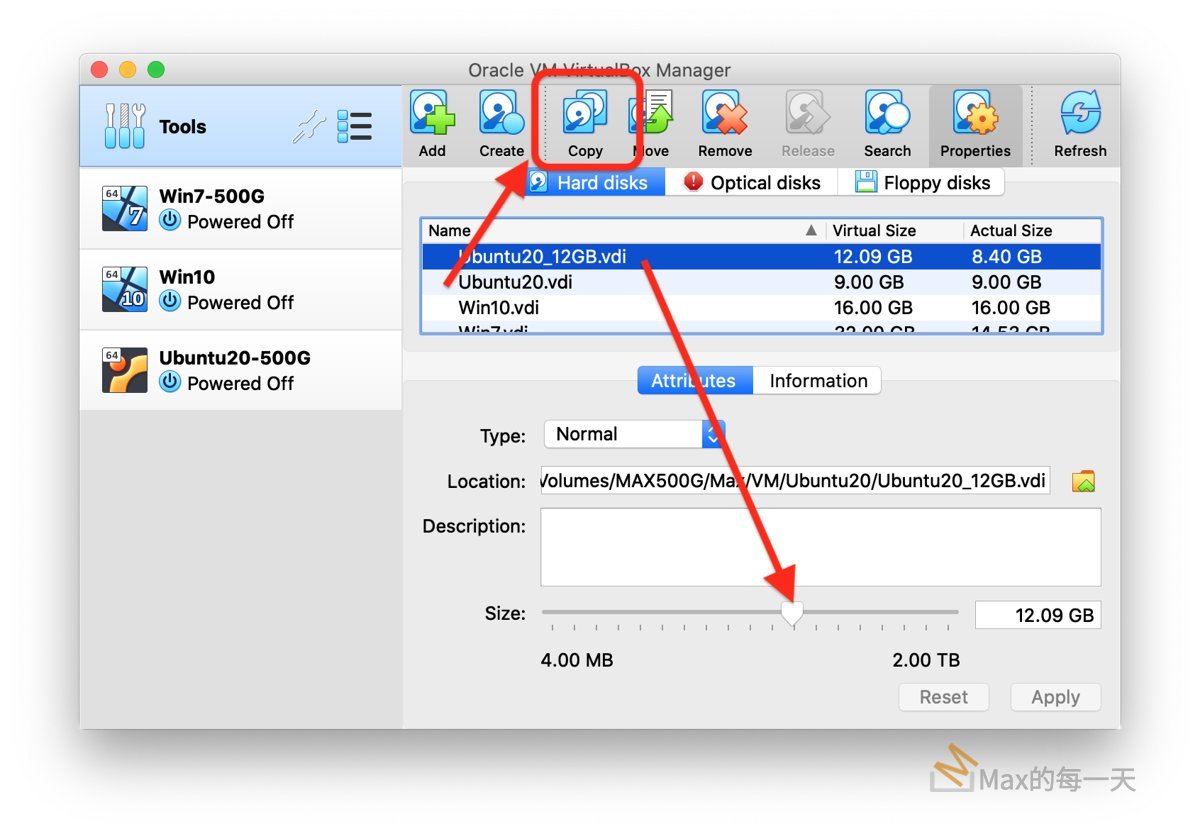
這個解法很簡單:
- 點舊的 Hard disks 的 VDI 檔案。
- 點上方 toolbar 裡的 copy 功能。
- 新產生的 VDI 的 size 可以在下方調整,最後按下 Apply就可以解決。
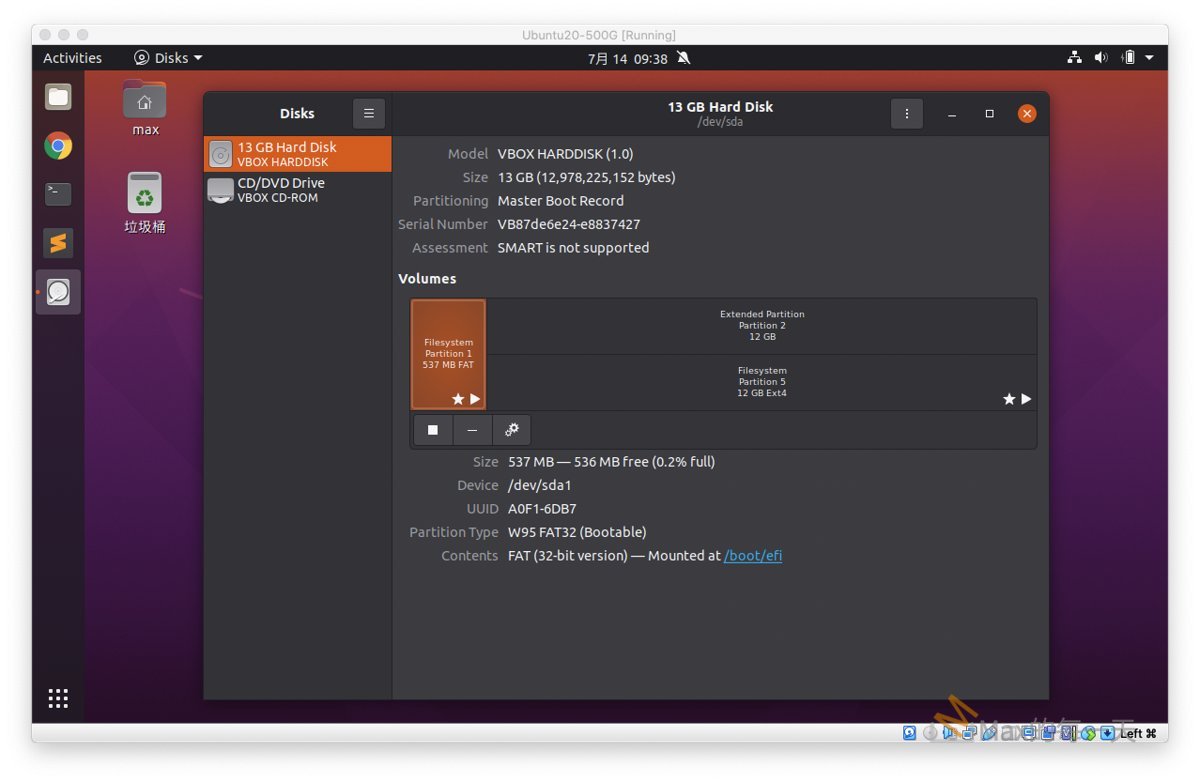
虛擬的硬碟設定完成之後,就是在 OS 裡調整 partition 大小。
Resize a filesystem/partition
- 開啟 Disks 的程式。
Open Disks from the Activities overview. - 點硬碟.
Select the disk containing the filesystem in question from the list of storage devices on the left. If there is more than one volume on the disk, select the volume which contains the filesystem. - 選單「齒輪」裡點「Resize…」
In the toolbar underneath the Volumes section, click the menu button. Then click Resize Filesystem… or Resize… if there is no filesystem.

- 調整為想要的大小後,按右上角的 Resize 按鈕。
A dialog will open where the new size can be chosen. The filesystem will be mounted to calculate the minimum size by the amount of current content. If shrinking is not supported the minimum size is the current size. Leave enough space within the filesystem when shrinking to ensure that it can work fast and reliably.Depending on how much data has to be moved from the shrunk part, the filesystem resize may take longer time.The filesystem resize automatically involves repairing of the filesystem. Therefore it is advised to back up important data before starting. The action must not be stopped or it will result in a damaged filesystem.

- Confirm to start the action by clicking Resize.The action will unmount the filesystem if resizing a mounted filesystem is not supported. Be patient while the filesystem is resized.
- After completion of the needed resize and repair actions the filesystem is ready to be used again.
要調整 2次,分別是較高的 Extended Partition 和較低的 Filesystem 各 resize 一次,Ubuntu 的系統就變正常了。