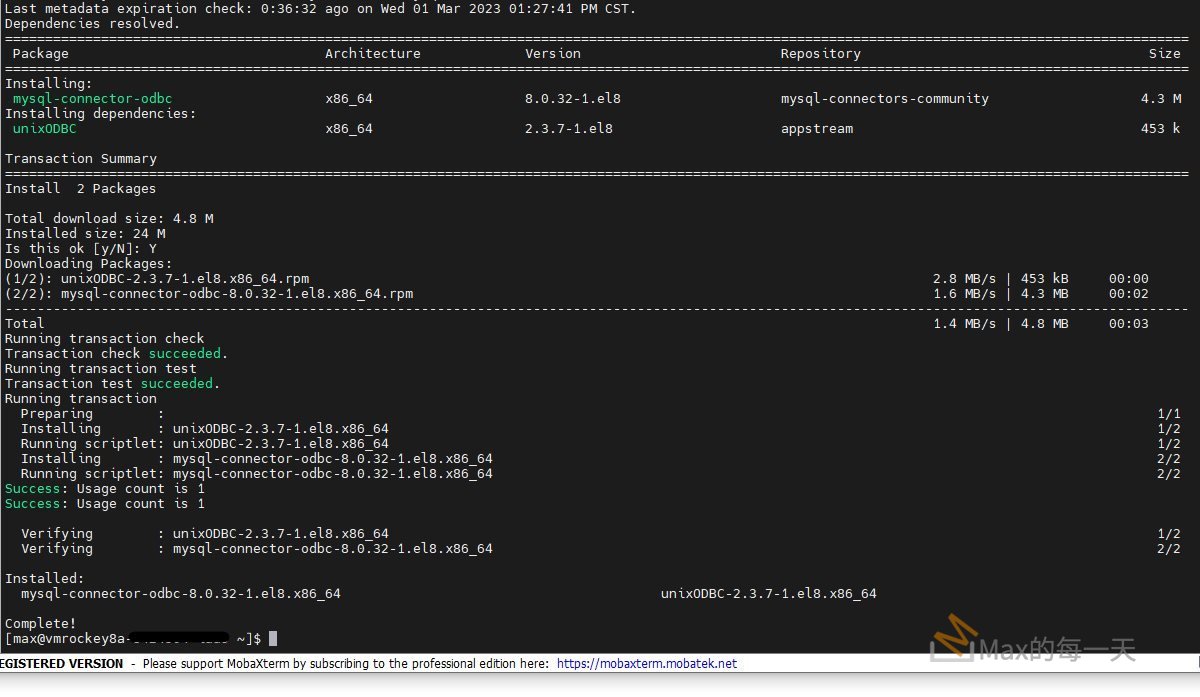
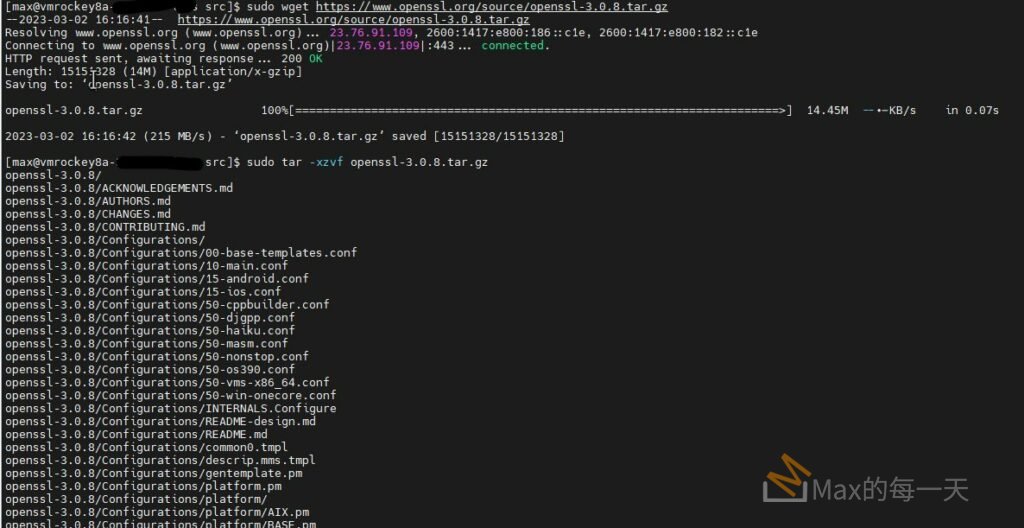
在有 GUI 的下載網頁, 沒有看到 Rocky linux:
https://www.mysql.com/products/connector/
還好有 yun 指令可以使用.
sudo yum update mysql-community-release
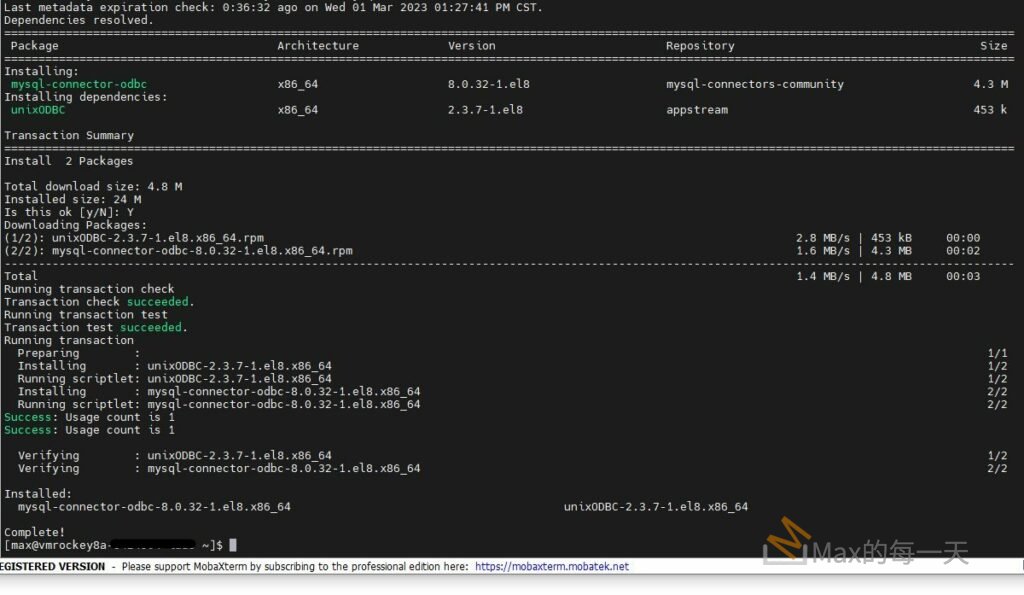
sudo yum install mysql-connector-odbc
安裝畫面:
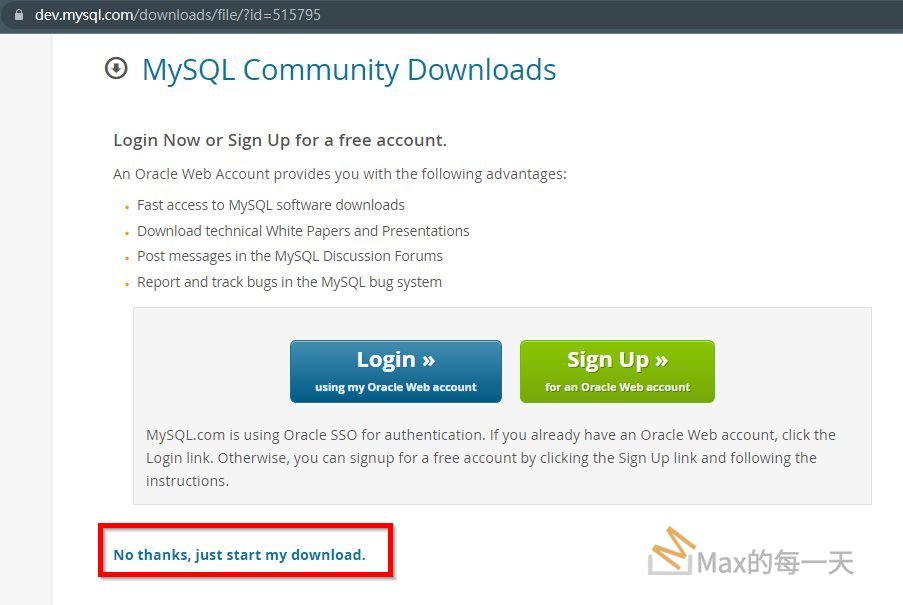
Mysql conectors下載:
https://www.mysql.com/products/connector/
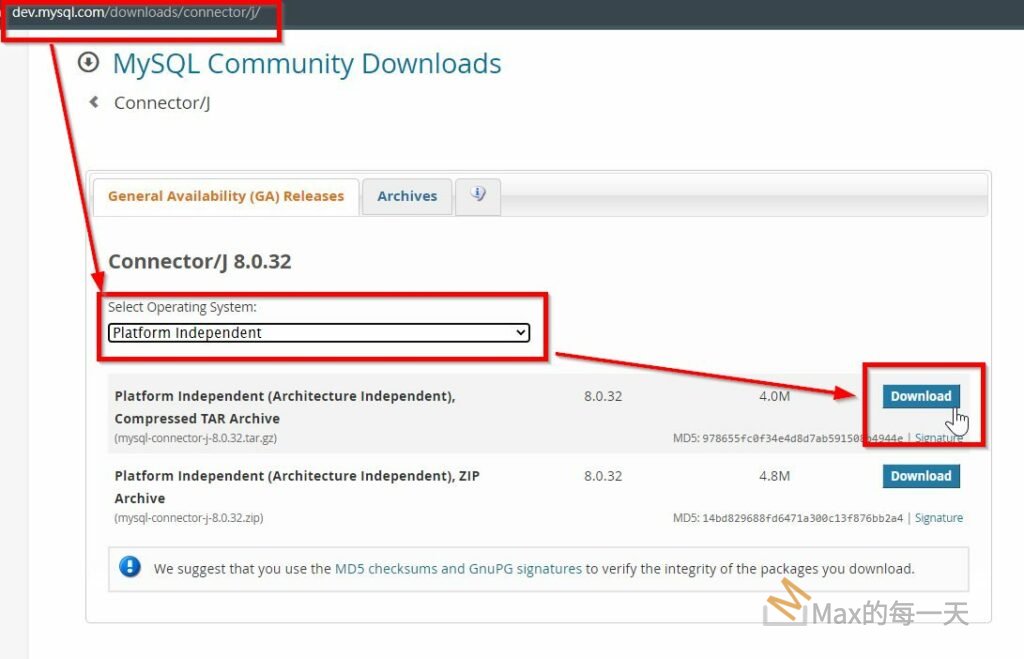
選 No thanks, just start my download.
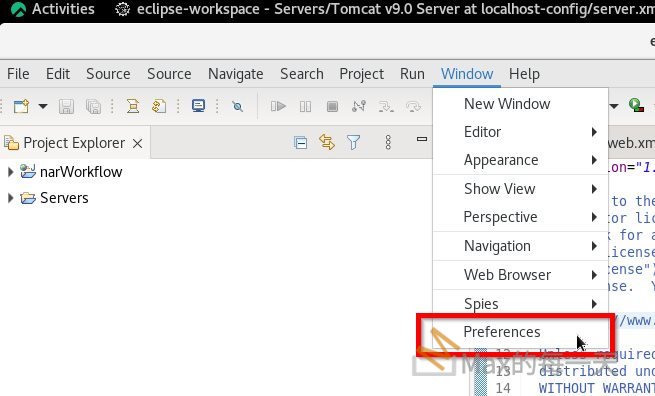
Window → Preferences in Eclipse.
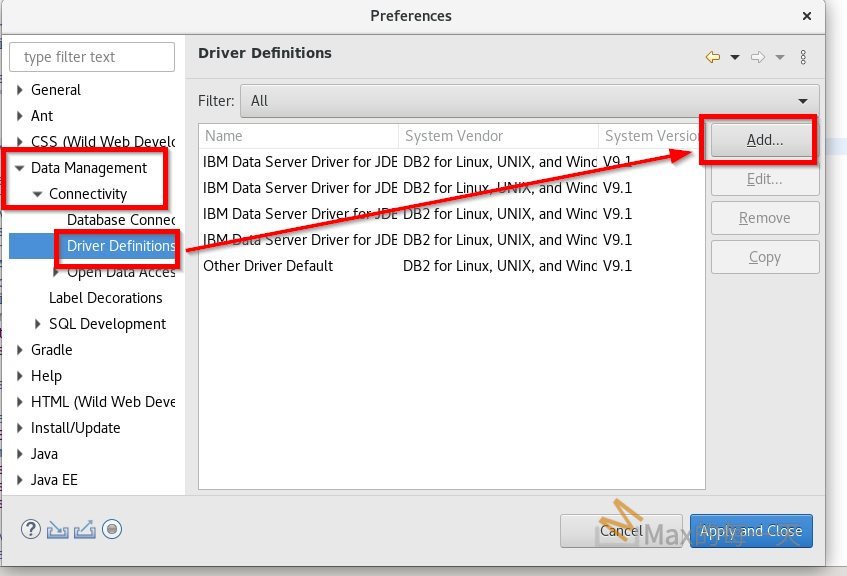
Expand the Data Management → Connectivity → Driver Definitions and click on the Add button.
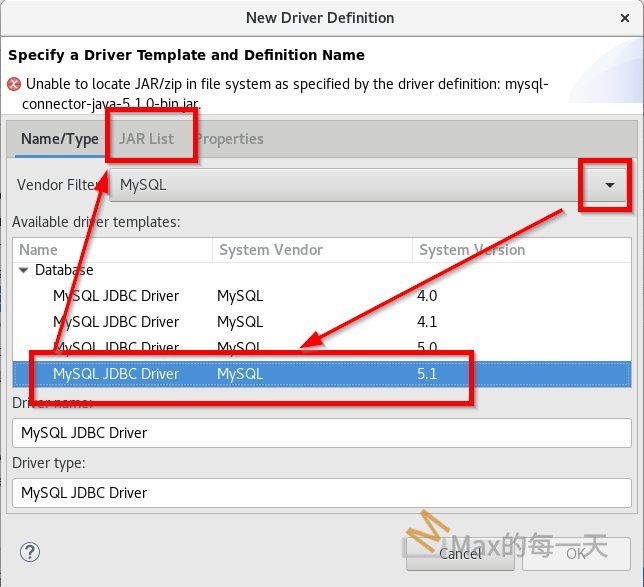
vendor filter combo box, 選 MySQL,
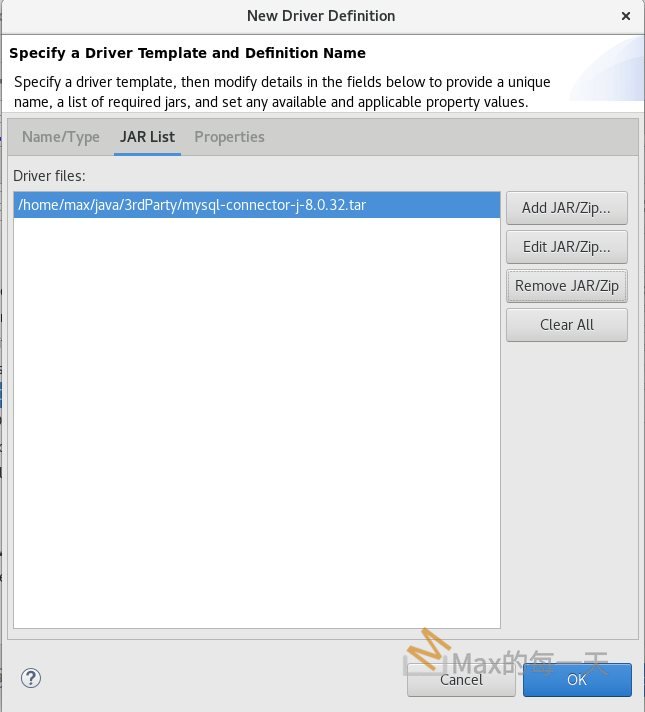
雖然我們是用 8.0, 這裡的 System Version, 因為沒有8.0 可以選, 可以先選 5.1, 然後再點上面的 JAR List 分頁.
按 Add.. 加入我們從網頁上下載的 .jar 檔, 下載時是 .zip, 要先解壓縮一次. 再把原本的 5.1 的 jar 檔刪掉. 然後按 OK.
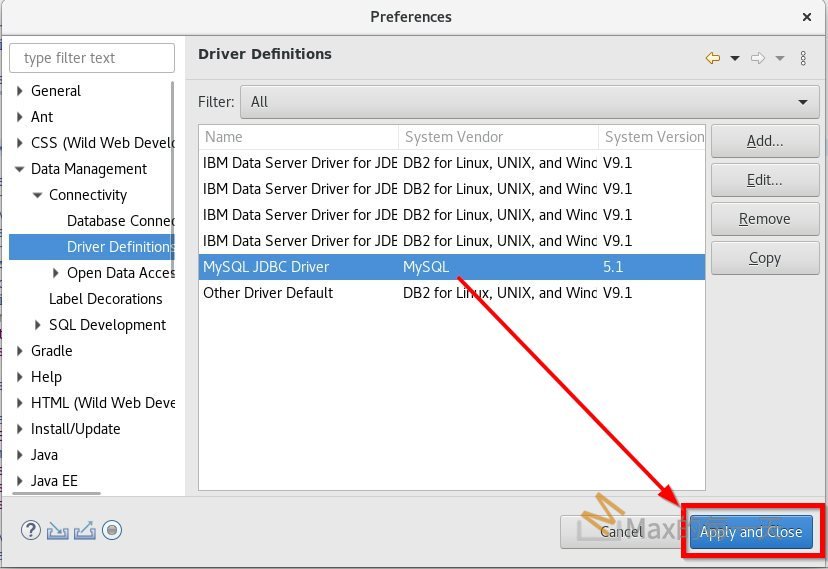
新增成功, 按 Apply and Close
public class MySingleTon {
    String url = "jdbc:mysql://localhost:3306/";
    String dbName = "test";
    String driver = "com.mysql.jdbc.Driver";
    String userName = "root";
    String password = "";

    private static MySingleTon myObj;
    private Connection Con ;
    private MySingleTon() {
        System.out.println("Hello");
        Con= createConnection();
    }

    @SuppressWarnings("rawtypes")
    public Connection createConnection() {
        Connection connection = null;
        try {
            // Load the JDBC driver
            Class driver_class = Class.forName(driver);
            Driver driver = (Driver) driver_class.newInstance();
            DriverManager.registerDriver(driver);
            connection = DriverManager.getConnection(url + dbName);
        } catch (ClassNotFoundException e) {
            e.printStackTrace();
        } catch (SQLException e) {
            e.printStackTrace();
        } catch (IllegalAccessException e) {
            e.printStackTrace();
        } catch (InstantiationException e) {
            e.printStackTrace();
        }
        return connection;
    }
範例2號:
import java.sql.Connection;
import java.sql.DriverManager;
import java.sql.SQLException;
import java.sql.Statement;
public class MySqlDemo {
public static Connection con;
public static final String JDBC_DRIVER ="com.mysql.jdbc.Driver";
public static final String DB_URL ="jdbc:mysql://localhost:3306/test";
public static final String USER ="root";
public static final String PASS ="";
public static void main(String[] args) throws Exception {
Class.forName(JDBC_DRIVER);
con=DriverManager.getConnection(DB_URL,USER,PASS);
Statement stmt=con.createStatement();
String sql="INSERT INTO user(id,password) VALUES ('max','my-password')";
int n=stmt.executeUpdate(sql);
if(n>0) { System.out.println("帳號增加成功!");
} else { System.out.println("失敗了!");
}
stmt.close();
con.close();
}
}
example 3:
import java.io.IOException;
import java.io.PrintWriter;
import java.sql.Connection;
import java.sql.DriverManager;

import javax.servlet.ServletException;
import javax.servlet.annotation.WebServlet;
import javax.servlet.http.HttpServlet;
import javax.servlet.http.HttpServletRequest;
import javax.servlet.http.HttpServletResponse;

/**
 * Servlet implementation class TestDbServlet
 */
@WebServlet("/TestDbServlet")
public class TestDbServlet extends HttpServlet {
    private static final long serialVersionUID = 1L;

    /**
     * @see HttpServlet#doGet(HttpServletRequest request, HttpServletResponse response)
     */
    protected void doGet(HttpServletRequest request, HttpServletResponse response) throws ServletException, IOException {

        // setup connection variables
        String user = "spstudent";
        String pass = "spstudent";

        String jdbcUrl = "jdbc:mysql://localhost:3306/web_customer_tracker?useSSL=false&serverTimezone=UTC";
        String driver = "com.mysql.cj.jdbc.Driver";

        // get connection to database
        try {
            PrintWriter out = response.getWriter();

            out.println("Connecting to database: " + jdbcUrl);

            Class.forName(driver);

            Connection myConn = DriverManager.getConnection(jdbcUrl, user, pass);

            out.println("SUCCESS!!!");

            myConn.close();

        }
        catch (Exception exc) {
            exc.printStackTrace();
            throw new ServletException(exc);
        }


    }

}
PS: Loading class ‘com.mysql.jdbc.Driver‘. This is deprecated. The new driver class is ‘com.mysql.cj.jdbc.Driver‘.
